Tasks Page
Time Period Page
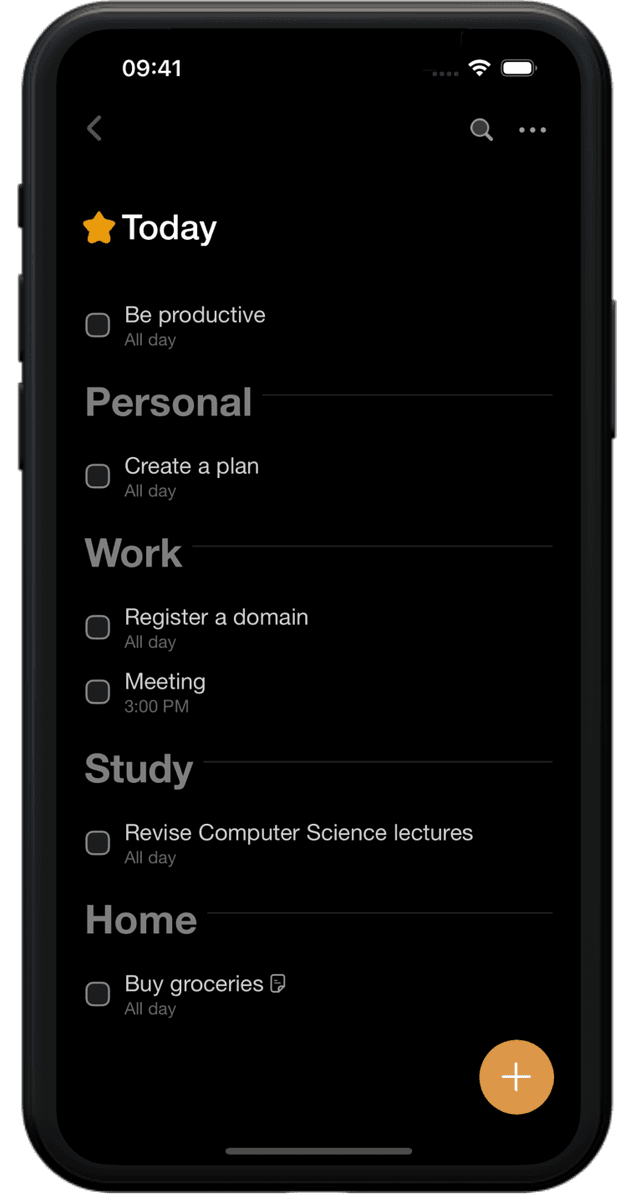
If you choose a specific time period page, such as Inbox, Today, Upcoming, or Log, the Tasks page will display tasks based on that selected time period. For example:
- Inbox: This view shows tasks that do not have a specific date assigned to them. It acts as a central hub for capturing tasks, ideas, or thoughts without immediate deadlines.
- Today: When you select the Today page, it displays tasks that are scheduled for the current day. It helps you prioritize and focus on tasks that need to be completed today.
- Upcoming: The Upcoming page shows tasks scheduled for future dates. You can navigate to different dates to view tasks for specific days in the future.
- Log: On the Log page, you can review a chronological list of completed tasks, categorized by their completion dates. This allows you to track your progress and review past accomplishments.
Project Page
-
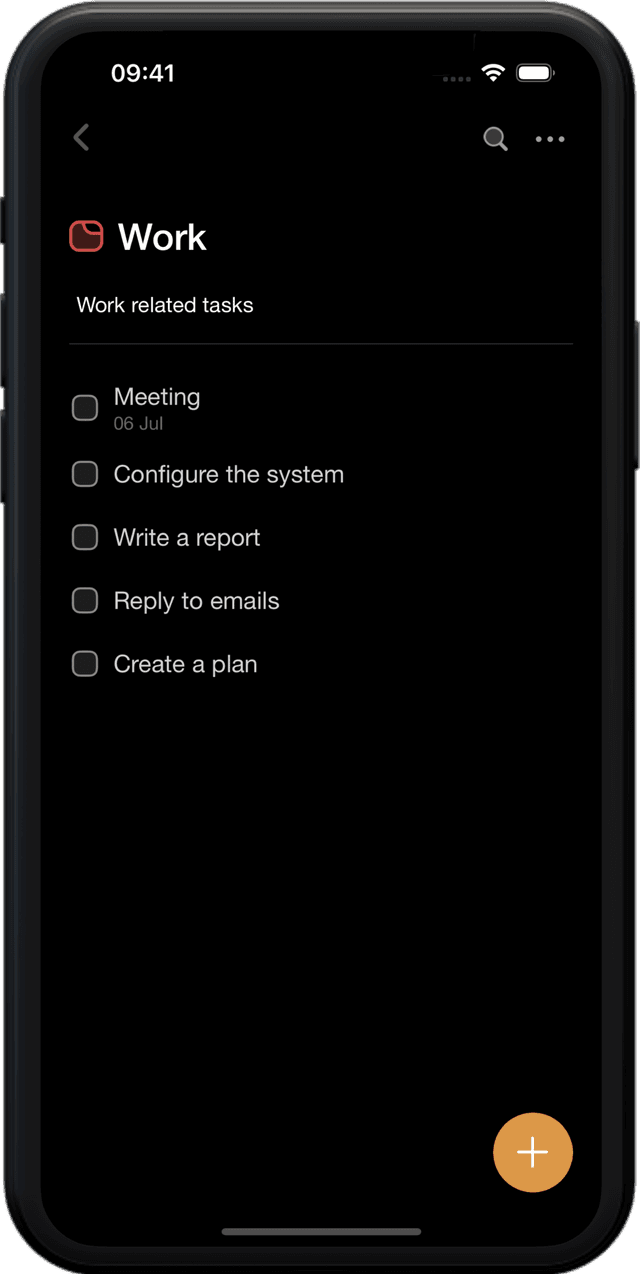
If you select a specific project from the Home Page, the page will display all tasks associated with that project, regardless of their dates. This view enables you to focus on tasks related to a specific project and monitor their progress. Completed tasks are not shown within the Tasks Page to maintain focus on ongoing tasks.
-
When creating a project, you have the option to set a name for it within the popup window. This allows you to define a specific name that accurately represents the project's purpose or content.
Additionally, if you need to change the project name at any time, you have two methods to do so:
Press on the project name
On the Projects page, choose the project you wish to rename. Press on the project name, and a text input field will appear. Enter the new name for the project and press Enter to save the changes.
Project Settings
Alternatively, you can access the More settings by tapping on the three dots located in the top right corner of the Projects page. From the options available, select "Change name." A text input field will appear, allowing you to modify the project's name. Once you've entered the new name, press Enter to save the changes.
Change Project Icon Color
To set the project icon color for a new project:
- During the project creation process, you have the opportunity to set the project icon color. Simply press on the project icon in the popup window, and a color palette will appear. Select the desired color for the project icon and click "Save" to assign the chosen color to the project.
To set the project icon color for an existing project:
- Select a project
- Select More settings (represented by three dots)
- A color palette will appear, allowing you to select a new color for the project icon. Once you've chosen the desired color, click "Save" to update the project's icon color.
Editing Task
- To edit a task, simply press on it, and a task details window will appear. Within the task details window, you can make changes to various properties of the task, such as the task name, date, project, priority, notes, and more.
Search
- To find a specific task, simply press on the search button located at the top of the Time Period or Project page. A search field will appear where you can enter a task name that you want to find. As you type, the search results will update dynamically, showing all tasks that correspond to the entered text.
Multi Section Mode
- Multi Section mode is available in the Inbox and Today pages. When enabled, tasks are automatically grouped into sections based on their associated projects. This allows you to view and manage tasks in a more organized manner. You can enable or disable Multi Section mode by tapping on the More button (three dots) located at the top right corner of the page.
- When Multi Section mode is enabled, tasks will be separated into sections based on the projects they are associated with. This helps to quickly identify and work on tasks within specific projects.
- When Multi Section Mode is disabled, tasks in the Inbox and Today pages will be displayed in a single, unified list without project-based sections. This provides a more streamlined view of tasks across all projects.
Swipes And Gestures
Task completion
- Press on the squircle icon associated with the task. This will mark the task as completed. If the task is already completed, you can press on the squircle icon again to return it to an uncompleted state.
Single Selection
The Single Selection Swipe feature allows you to select a single task by swiping left on the desired task. This feature provides a quick and intuitive way to mark a task to perform specific operations on the selected task.
- Swipe left on the task using a gesture, as you swipe left, the task will be visually highlighted or marked to indicate its selection
- Once selected editing mode is enabled and you can perform various actions on the task, such as editing, deleting, or assigning it to a project.
Deleting Task
The Swipe-to-Delete feature allows you to delete a selected task by swiping right on the desired task. This feature provides a convenient and efficient way to remove individual tasks from your task list.
- Swipe right on the task,as you swipe right, the task will be visually marked or highlighted to indicate its selection for deletion.
- Release the swipe gesture to trigger the deletion popup to verify task deletion.
Please note that deleting tasks is an irreversible action. Once you delete tasks, they cannot be restored.
Multi Selection
The Multi-Selection feature enables you to select multiple tasks at once. Here's how it works:
- Swipe left on a task and drag your finger up or down to select multiple tasks.
- Release your finger to finalize the selection.
- Once selected editing mode is enabled and you can perform actions like editing, deleting, or assigning tasks to projects by pressing on More button.
- You can also manually select or deselect individual tasks by tapping on them.
More Settings
The "More" settings can be accessed by tapping on the three dots located in the top right corner of the page.
When editing mode is enabled (1 or more tasks are selected):
- Change Project: This option allows you to quickly change the project for the selected tasks. You can reassign them to a different project to better organize your tasks, or remove the project from those tasks.
- Change Date: With this option, you can easily modify the dates for the selected tasks. Adjusting the dates ensures your tasks align with your updated schedule.
- Tick: Selecting this option marks all the selected tasks as completed simultaneously. It's a convenient way to quickly update the status of multiple tasks.
- Delete: This option enables you to delete all the selected tasks at once. It helps you efficiently remove tasks that are no longer relevant or needed.
When editing mode is disabled:
- Select: Tapping on this option activates the editing mode, allowing you to select and perform actions on multiple tasks simultaneously.
- Log done: The app automatically moves past completed tasks to the Log page to keep your tasks organized. However, tasks that are scheduled for today or the future will not be moved to the Log page. This is done intentionally to provide you with the option to uncomplete those tasks if you change your mind. However, the Log done button forces those completed tasks that are scheduled for today or the future to move into Log page, thus allowing more organized view.
- Enable/Disable Multi-Section Mode: This option controls the visibility of project-based sections within the task list. Enabling multi-section mode organizes tasks by projects, while disabling it presents a unified view of tasks across all projects.
- Change name: (only when a project is selected): Allows to change project name of the selected project.
- Change color: (only when a project is selected): Allows to change project icon color of the selected project.
- Delete project: (only when a project is selected): Allows to delete selected project.
- Share project: (only when a project is selected): Allows to share the current project with other DayNight users.