Smart Schedule Planner
On the Home screen, locate the Plus button and press it. A menu will appear, and among the options, select Schedule.
Basic Settings
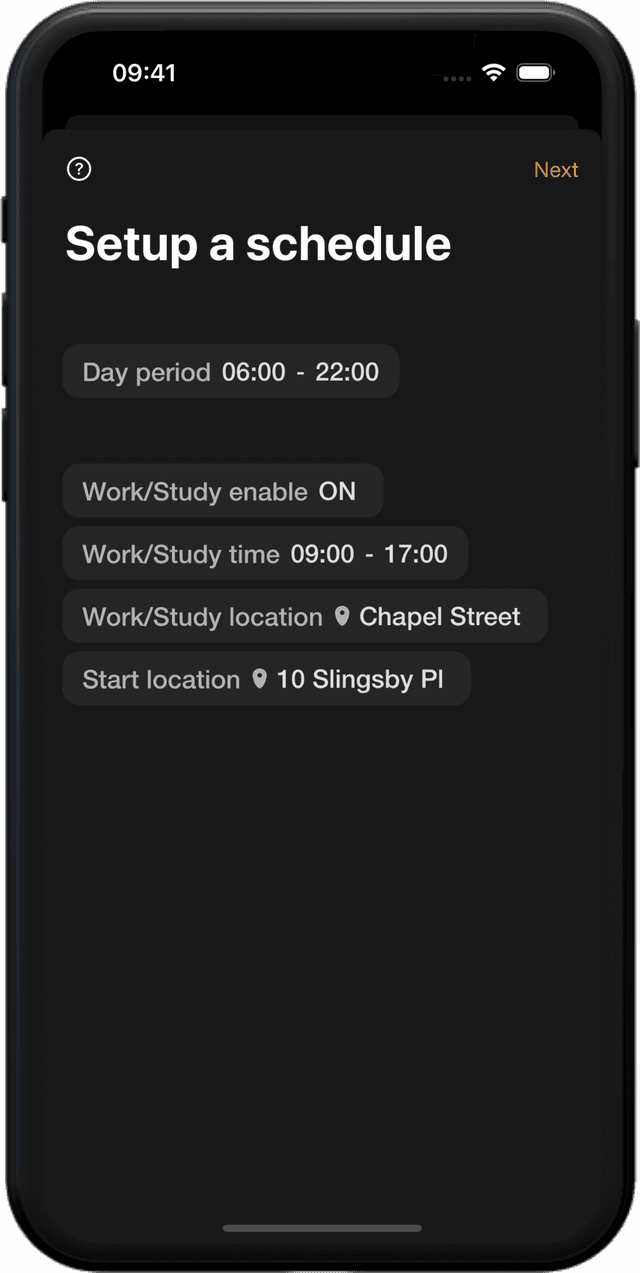
Day Period
In the Day Period section, you can select the time when you typically wake up and fall asleep. Please note that both events have a fixed duration of 30 minutes, and you cannot modify it at this time. It's important to keep this in mind when adding manual events to your schedule, as they may interfere with the predefined wake-up and sleep events. The Save button will be disabled if any conflicts arise.
Work/Study time
This toggle option allows you to enable or disable the inclusion of a dedicated work/study block in your schedule. When enabled, you can set specific time in the Work/Study time.
Work/Study and Start location
By specifying your Work/Study Location and Start Location, the app can estimate the distance between your home and work/study locations. This information is used to calculate commute duration and seamlessly integrate it into your schedule. This feature utilizes the Google Maps API to provide accurate commute time estimates.
Customizing these settings helps the app tailor your schedule to your unique routine and optimize productivity. Take control of your daily schedule by setting your preferred day period, enabling work/study blocks, and providing location information for accurate commute calculations.
Manual Events
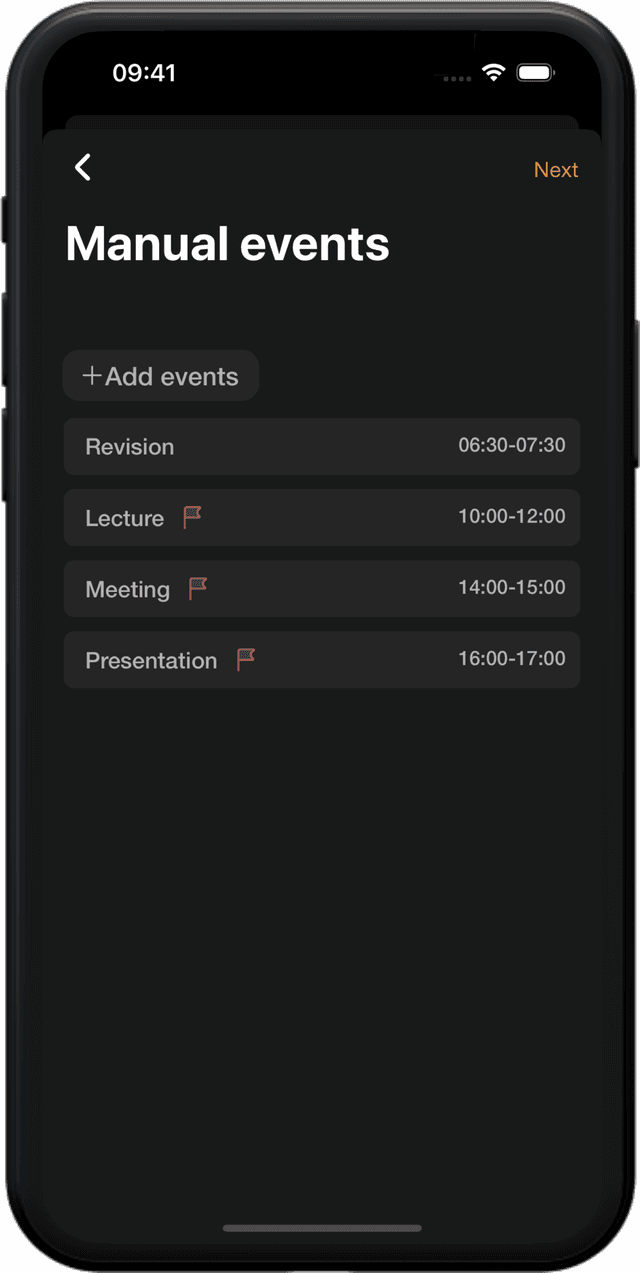
By adding manual events, you can ensure that important tasks, appointments, or activities are incorporated into your schedule effectively. Take advantage of this feature to customize your daily routine and make the most out of your time.
The Manual Events feature allows you to add custom events to your schedule that require specific time slots.
Add events
Tap on the "Add Events" button on the screen.
Add event properties
- Enter the name of the event in the designated field.
- Set the start and end time for the event.
- Choose the priority level for the event (high or low). You can change the priority level by tapping on it.
High priority events have a specific time slot allocated to them and will not be adjusted by the schedule. Low priority events, however, may be subject to changes if they conflict with other scheduled events.
Finish
Once you have entered all the necessary details, click on the "Next" button to proceed.
Event deletion
You can delete a manual event by swiping right on the event.
Automatic Events
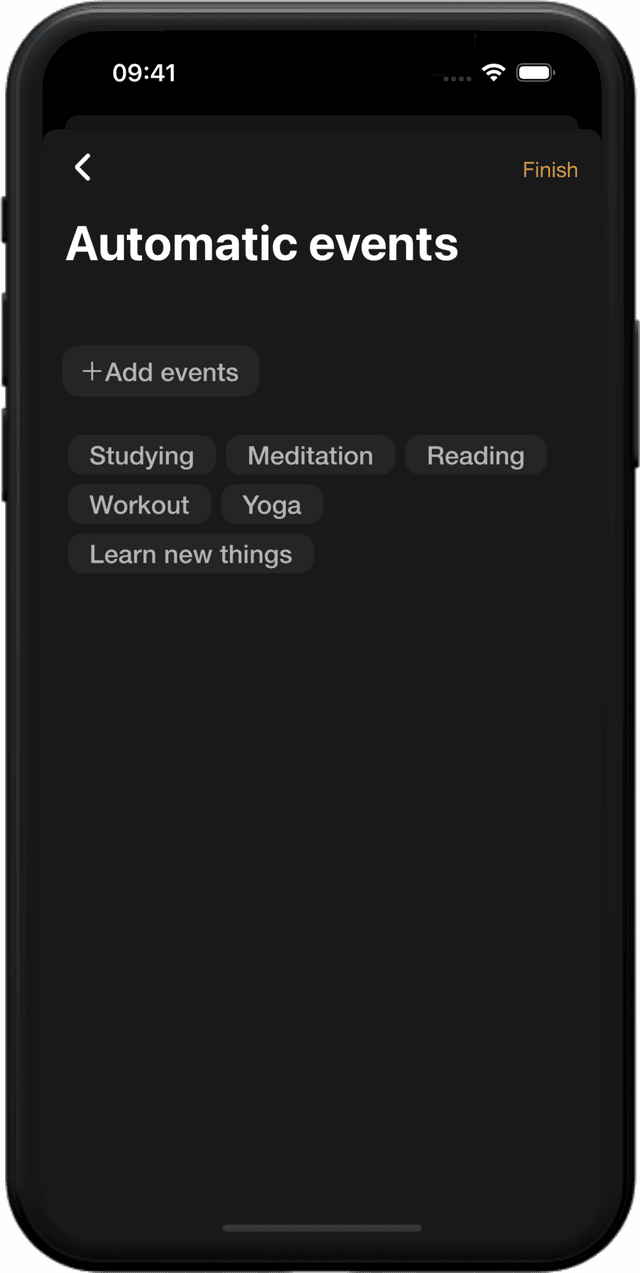
The Automatic Events feature in the app allows you to add adaptable events to your schedule. These events are pre-defined and can be dynamically inserted into available time slots. To add automatic events, follow these steps:
Add events
Tap on the "Add Events" button to add automatic events.
Choose events
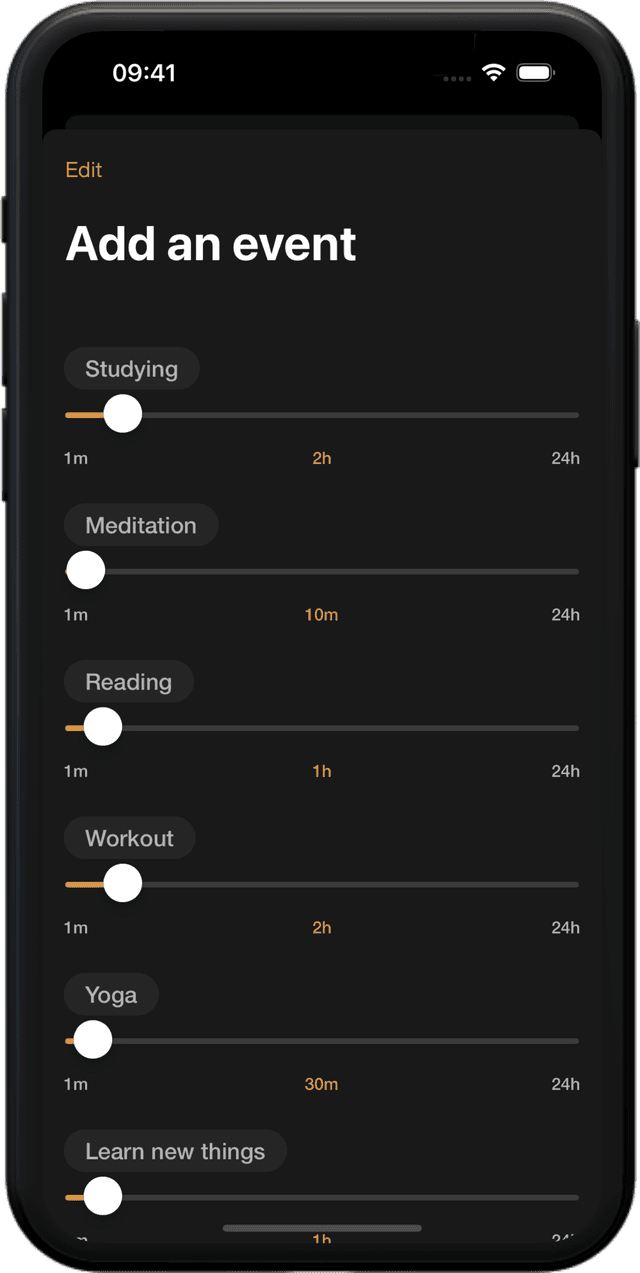
Choose from the list of pre-defined automatic events. (More options will be added in the future) If you want to adjust the duration of the selected event, tap on the "Edit" button located at the top left corner of the screen.
Modify duration
Modify the duration of the event according to your preference.
Finish
Once you are satisfied with the event selection and duration, tap on the "Save" button. When you have finished adding automatic events, tap on the "Finish" button to save your changes.
With Automatic Events, the system will find available time slots and insert these adaptable events into your schedule. This feature helps to optimize your daily routine and ensures that important activities are efficiently incorporated into your busy schedule.
Final Schedule
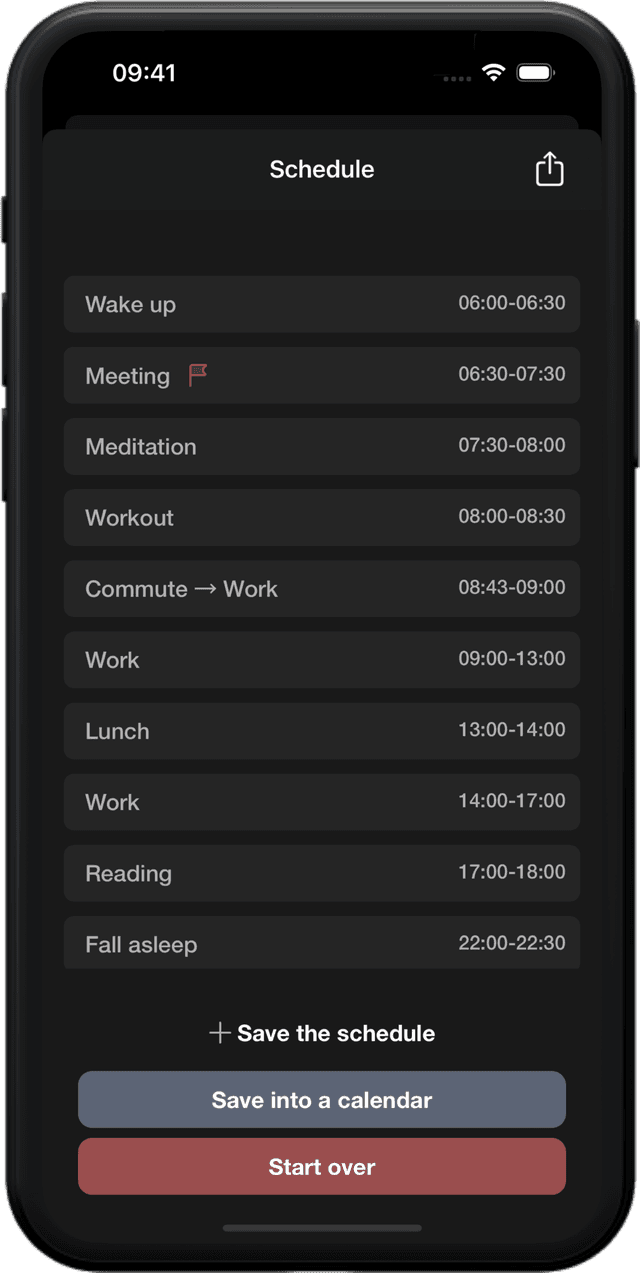
The final screen represents the completed schedule based on your previously set preferences and added events. Here, you have the following options
-
Save the Schedule: By pressing the "Save the schedule" button, you can save the generated schedule within the app. This allows you to refer back to the schedule later and load it when needed. On the home screen, you can press the Plus button to open a popup menu. In this menu, you have the option to either load the previously saved schedule or create a new schedule from scratch.
-
Save into a Calendar: The button enables you to save the generated schedule into your iPhone calendar. By selecting this option, the schedule will be saved to today's date in your calendar.
-
Start Over: If you want to start the whole process of creating a schedule from the beginning, you can press the "Start over" button. This will reset all the settings and events, allowing you to reconfigure your preferences and create a new schedule.